「ガラスのような見た目のUIを実装したい!」
本記事ではそんな要望にお答えします。
Flutterでガラスのような見た目のUIを実装できるウィジェットを提供するパッケージ、 glassmorphism パッケージを紹介します。
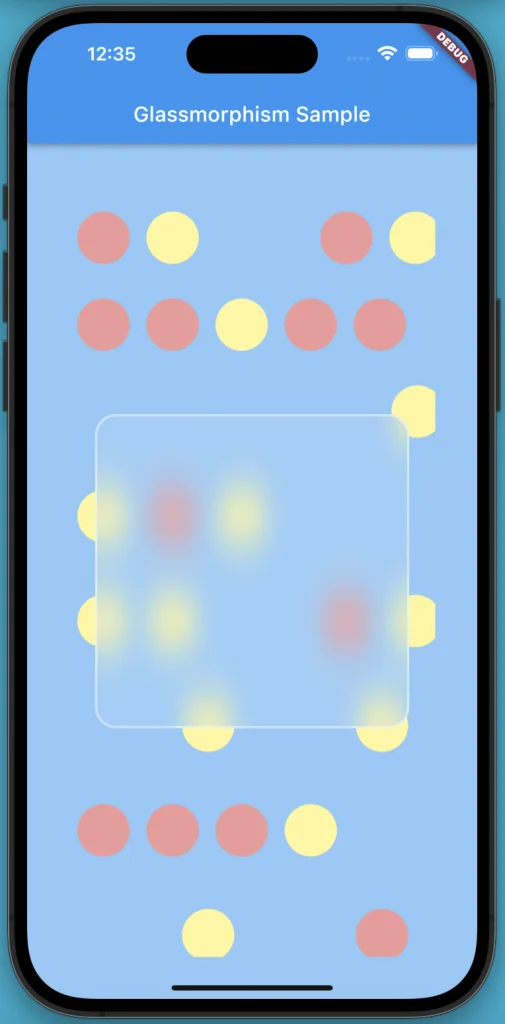
このパッケージを利用すると、以下のような磨りガラスの見た目のUIが実装できます。

基本的な基本的な使い方を詳細に解説します。
ぜひ読んでみて下さい!
基本的な使い方
基本的な使い方について解説していきます。
準備
まず準備として、パッケージのインストールと、 Dartファイルへのインポート文の追加を行います。
パッケージのインストール
CLI(macならターミナル)で、自分のプロジェクトのルートにて 以下のコマンドを実行しパッケージをインストールします。
flutter pub add glassmorphismパッケージのインポート
実装したいDartファイルの上部に以下のインポート文を追加し、 パッケージをインポートします。
import 'package:glassmorphism/glassmorphism.dart';実装
実装方法について解説します。
実装したい場所にGlassmorphicContainerを配置します。
GlassmorphicContainerにて、以下の必須プロパティを設定します。
width: 幅をdoubleで指定height: 高さをdoubleで指定borderRadius: 角丸の大きさをdoubleで指定blur: ぼかしの度合いをdoubleで指定border: 枠線の太さをdoubleで指定LinearGradient: 全体の色をLinearGradientで指定borderGradient: 枠線の色をLinearGradientで指定
設定例は以下となります。
GlassmorphicContainer(
              width: 300,
              height: 300,
              borderRadius: 20,
              blur: 10,
              border: 2,
              linearGradient: LinearGradient(
                colors: [
                  Colors.white.withOpacity(0.1),
                  Colors.white.withOpacity(0.1),
                ],
              ),
              borderGradient: LinearGradient(
                colors: [
                  Colors.white.withOpacity(0.5),
                  Colors.white.withOpacity(0.5),
                ],
              ),
),LinearGradientにて色を2色設定することで、その2色でのグラデーションを色として設定することができます。
色にwithOpacityで透明度を設定することで、
裏側が透けた状態を再現することができます。
全体のサンプルコード
import 'dart:math';

import 'package:flutter/material.dart';
import 'package:glassmorphism/glassmorphism.dart';

void main() {
  runApp(const MyApp());
}

class MyApp extends StatelessWidget {
  const MyApp({super.key});

  @override
  Widget build(BuildContext context) {
    return MaterialApp(
      title: 'Flutter Demo',
      theme: ThemeData(
        primarySwatch: Colors.blue,
      ),
      home: const MyHomePage(),
    );
  }
}

class MyHomePage extends StatelessWidget {
  const MyHomePage({super.key});

  @override
  Widget build(BuildContext context) {
    return Scaffold(
      appBar: AppBar(
        title: const Text('Glassmorphism Sample'),
      ),
      body: Stack(
        children: [
          Container(
            padding: const EdgeInsets.all(40),
            width: double.infinity,
            height: double.infinity,
            color: Colors.blue[200],
            child: ListView(
              children: List.generate(10, (index) {
                return SingleChildScrollView(
                  scrollDirection: Axis.horizontal,
                  child: Row(
                    mainAxisAlignment: MainAxisAlignment.spaceEvenly,
                    children: List.generate(5, (index) {
                      if (Random().nextInt(2) == 0) {
                        return Padding(
                          padding: const EdgeInsets.all(8),
                          child: Container(
                            width: 50,
                            height: 50,
                            decoration: BoxDecoration(
                              shape: BoxShape.circle,
                              color: Random().nextBool()
                                  ? Colors.red[200]
                                  : Colors.yellow[200],
                            ),
                          ),
                        );
                      }
                      return const SizedBox(
                        width: 100,
                        height: 100,
                      );
                    }),
                  ),
                );
              }),
            ),
          ),
          Align(
            child: GlassmorphicContainer(
              width: 300,
              height: 300,
              borderRadius: 20,
              blur: 10,
              border: 2,
              linearGradient: LinearGradient(
                colors: [
                  Colors.white.withOpacity(0.1),
                  Colors.white.withOpacity(0.1),
                ],
              ),
              borderGradient: LinearGradient(
                colors: [
                  Colors.white.withOpacity(0.5),
                  Colors.white.withOpacity(0.5),
                ],
              ),
            ),
          )
        ],
      ),
    );
  }
}
child の設定
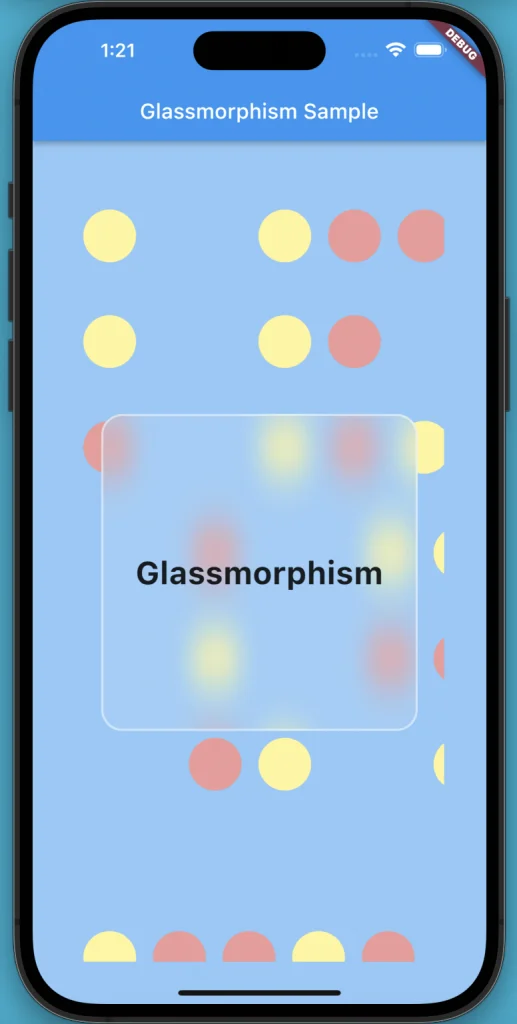
child プロパティにてGlassmorphicContainerの中に表示するウィジェットを設定可能です。
また、alignmentプロパティにて、表示位置を設定可能です。
GlassmorphicContainer(
              // ...
              alignment: Alignment.center,
              child: const Text(
                'Glassmorphism',
                style: TextStyle(
                  fontSize: 30,
                  fontWeight: FontWeight.bold,
                ),
              ),
            ),
まとめ
本記事ではFlutterでガラスのような見た目のUIを実装できるウィジェットを提供するパッケージ、 glassmorphism パッケージを紹介しました。
基本的な使い方を詳細に解説しました。
いかがだったでしょうか?
設定プロパティが多いですが、 どこで何を設定すればガラスの見た目を再現できるか分かりやすいため、 有用なパッケージかと思います。
本記事があなたのアプリ開発の一助となれば幸いです。
Flutterを一緒に学んでみませんか? Flutter エンジニアに特化した学習コミュニティ、Flutter大学への入会は、 以下の画像リンクから。
編集後記(2022/10/28)
自分は千葉に住んでいるのですが、 最近めっきり寒くなってきましたね。
ほとんど家の中での生活のため、半袖半パンで先週まで過ごしていたのですが、 流石に寒くて限界が来ました。
今週は外に出る機会が多い週で、外の寒さもしっかりと感じています。 コートを着てもおかしくないような、そんな温度感かな、と思います。
場所によっては、紅葉も綺麗な時期ですよね。 栃木に5年ほど住んでいましたが、 毎回時期を逃して日光の紅葉を見に行けなかったのを思い出しました。
秋が知らないうちに通り過ぎてしまうような季節の流れですが、 せめて美味しいものを食べて秋を感じようと思いました。
週刊Flutter大学では、Flutterに関する技術記事、Flutter大学についての紹介記事を投稿していきます。 記事の更新情報はFlutter大学Twitterにて告知します。
