

本記事ではそんな疑問、要望にお答えします。
基本的なボタンの色の変え方から、 カーソルがホバーした時、ボタンが押された時、 それぞれでボタンの色を設定する方法まで解説します。
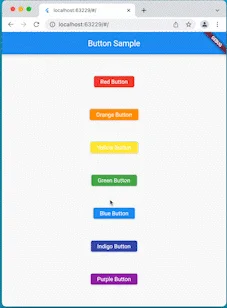
以下のgifのようにさまざまな色を持ち、 ホバーした時、ボタンが押された時に色が変わるボタンが作成可能です。
初心者の方が悩む部分かと思いますので、ぜひ参考にしてみてください!
ElevatedButtonの色の変え方

ボタンを定義する、ElevatedButtonの色は以下のように設定することで変更可能です。
ElevatedButton(
                onPressed: () {},
                style: ButtonStyle(
                  backgroundColor: MaterialStateProperty.all(Colors.red),
                ),
                child: const Text('Red Button'),
),styleプロパティにてbackgroundColorを指定するButtonStyleを設定します。
backgroundColorにMaterialStateProperty.all(〜)を設定し、~の部分に色を定義すれば、
ボタンの色を好きな色に設定可能です。
ユーザーのアクションに対してボタンの色を変える方法

ボタンにカーソルをホバーさせた時、ボタンを押下した時など、 ユーザーのアクションに対してボタンの色を変える方法について解説します。
まず、前提知識として、MaterialStateとMaterialStatePropertyについて説明します。
MaterialState と MaterialStateProperty
ユーザーからのアクションはMaterialStateというenumにて定義されています。
上記のホバーされた時、や押下された時のような状態がまさに定義されています。
例:
// カーソルがホバーされた時
MaterialState.hovered
//押された時
MaterialState.pressed
//フォーカスを受けた時
MaterialState.focusedこのMaterialStateに応じて値を返すよう定義されているのがMaterialStatePropertyです。
MaterialStatePropertyのresolveWithというメソッドで、
MaterialStateに対して値(今回の場合は色)を返すように設定できます。
今回のElevatedButtonの例でいうと、このようになります。
ElevatedButton(
                onPressed: () {},
                style: ButtonStyle(
                  backgroundColor: MaterialStateProperty.resolveWith(
                      (Set states) {
                    Color? color = Colors.red;

                    if (states.contains(MaterialState.hovered)) {
                      color = Color.lerp(color, Colors.black, 0.3);
                    }
                    if (states.contains(MaterialState.pressed)) {
                      color = Color.lerp(color, Colors.black, 0.5);
                    }
                    return color;
                  }),
                ),
                child: const Text('Red Button'),
              ),
※ Color.lerp は 割合分 第一引数の色を第2引数に寄せてColorを返すメソッドです。
今回は暗くするため、黒に寄せています。
ポイントはstatesにユーザーのアクションに対するMaterialStateが入っており、
それに対して条件分岐を行っている点です。
これにより、ホバーされた時や、押下された時の色を指定することが可能となります。
サンプルコード
冒頭で紹介したgifのサンプルコードを紹介します。
import 'package:flutter/material.dart';

void main() {
  runApp(const MyApp());
}

class MyApp extends StatelessWidget {
  const MyApp({Key? key}) : super(key: key);

  @override
  Widget build(BuildContext context) {
    return const MaterialApp(
      home: ButtonPage(),
    );
  }
}

class ButtonPage extends StatelessWidget {
  const ButtonPage({Key? key}) : super(key: key);

  @override
  Widget build(BuildContext context) {
    return Scaffold(
      appBar: AppBar(
        title: const Text('Button Sample'),
      ),
      body: SafeArea(
        child: Center(
          child: Column(
            mainAxisAlignment: MainAxisAlignment.spaceEvenly,
            children: [
              ElevatedButton(
                onPressed: () {},
                style: const ButtonStyle(
                  //1
                  backgroundColor: ButtonBackgroundColor(Colors.red),
                ),
                child: const Text('Red Button'),
              ),
              ElevatedButton(
                onPressed: () {},
                style: const ButtonStyle(
                  backgroundColor: ButtonBackgroundColor(Colors.orange),
                ),
                child: const Text('Orange Button'),
              ),
              ElevatedButton(
                onPressed: () {},
                style: const ButtonStyle(
                  backgroundColor: ButtonBackgroundColor(Colors.yellow),
                ),
                child: const Text('Yellow Button'),
              ),
              ElevatedButton(
                onPressed: () {},
                style: const ButtonStyle(
                  backgroundColor: ButtonBackgroundColor(Colors.green),
                ),
                child: const Text('Green Button'),
              ),
              ElevatedButton(
                onPressed: () {},
                style: const ButtonStyle(
                  backgroundColor: ButtonBackgroundColor(Colors.blue),
                ),
                child: const Text('Blue Button'),
              ),
              ElevatedButton(
                onPressed: () {},
                style: const ButtonStyle(
                  backgroundColor: ButtonBackgroundColor(Colors.indigo),
                ),
                child: const Text('Indigo Button'),
              ),
              ElevatedButton(
                onPressed: () {},
                style: const ButtonStyle(
                  backgroundColor: ButtonBackgroundColor(Colors.purple),
                ),
                child: const Text('Purple Button'),
              ),
            ],
          ),
        ),
      ),
    );
  }
}

//2
class ButtonBackgroundColor implements MaterialStateProperty {
  const ButtonBackgroundColor(this.baseColor);

  final Color baseColor;

  @override
  Color? resolve(Set states) {
    Color? color = baseColor;

    if (states.contains(MaterialState.hovered)) {
      color = Color.lerp(color, Colors.black, 0.3);
    }
    if (states.contains(MaterialState.pressed)) {
      color = Color.lerp(color, Colors.black, 0.5);
    }
    return color;
  }
}
//1
毎回MaterialStateProperty.resolveWithで関数を定義するのは冗長のため、
MaterialStateProperty<Color?> を実装した、ButtonBackgroundColorクラスを定義し、設定しています。
//2
ButtonBackgroundColorクラスの定義部分です。
resolveというメソッドをoverrideし、
このメソッド内に、MaterialStateに応じて色を返すロジックを書いています。
※前章で記載したMaterialStateProperty.resolveWithの中身とほぼ同内容です。
本記事で初回したサンプルコードは以下のDartPadに用意されています。 ぜひ触ってみてください。
まとめ

本記事では、基本的なボタンの色の変え方から、 カーソルがホバーした時、ボタンが押された時、 それぞれでボタンの色を設定する方法まで解説しました。
ButtonStyleの中のプロパティでの設定でない点が、 少し難しく、代わりに応用が効く形になっているのかな、と思います。
ぜひ本記事を参考にボタンに色を設定してみてください!
Flutterを一緒に学んでみませんか? Flutter エンジニアに特化した学習コミュニティ、Flutter大学への入会は、 以下の画像リンクから。
参考
編集後記(2022/04/20)
本記事は参考にあるDecording Flutterの内容をかいつまんで紹介した記事でした。
Flutterの公式が色々なテーマで深堀りの内容を紹介してくれる、 Decording Flutter、みなさんは見ていますか?
ちょっと内容について難しく感じる部分はあるかもしれませんが、 英語の字幕もついていて、とても見やすいコンテンツになっているかと思います。
Flutterで何ができるのか?の知識を広げるのに有用な動画シリーズだと、 個人的には思います。
ぜひまだ見ていない方や見たことのない方は見てみることを
週刊Flutter大学では、Flutterに関する技術記事、Flutter大学についての紹介記事を投稿していきます。 記事の更新情報はFlutter大学Twitterにて告知します。
