「 キーボードショートカット を実装したい!」
本記事ではそんな要望にお答えします。
Flutterでのキーボードショートカットの実装方法について解説します。 Control + C キーなど、キーボードの特定のキーを押下することで、 コピーなどの機能を実行する、そんなアプリケーションが作れるようになります。
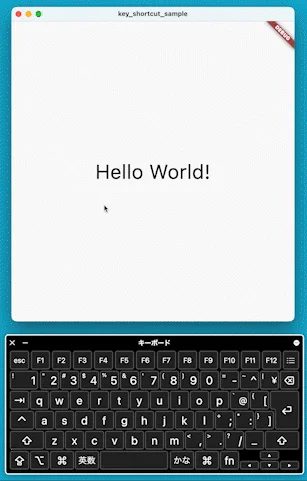
以下のGIFは今回紹介するサンプルアプリの実行動画です。 control + R , contorol + B でそれぞれ文字色が変わる、そんなアプリとなっています。

基礎的な部分から丁寧に解説していきます。 ぜひ読んでみてください!
実装方法
実装方法は3段階に分かれます。
- キーボードのキーの押下の検知 (
Focusウィジェット) - どのキーが押されたかの判定(
Shortcutsウィジェット) - 押されたキーに対応した処理の登録、実行(
Actionsウィジェット)
それぞれ解説していきます!
キーボードのキーの押下の検知 (Focusウィジェット)
キーボードのキーの押下の検知は、アプリ内で構成要素がFocusされている必要があります。
TextFieldの選択状態のように、
ある特定の構成要素に注目が集まっている状態をFocusされている、と呼びます。
参考
TextFieldのように選択時に自動でFocusされるウィジェットならこの項の処理は不要ですが、
今回のアプリのように画面内にTextしかない場合は、
アプリ内でTextにFocusするように設定が必要です。
あるウィジェットをFocusされるように設定するのには、
Focusウィジェットでラップすれば良いです。
Focus(
  autofocus: true,
  child: Text(
    'Hello World!',
    style: TextStyle(
      fontSize: 40,
      color: _color.value,
    ),
  ),
),今回のアプリでは画面をクリックした際にTextからFocusが離れるのを防ぐため、
以下の処理で強制的にFocusが戻るように設定しています。
Focusの設定
class _MyWidgetState extends State {
  final ValueNotifier _color = ValueNotifier(Colors.black);

  final FocusNode _focusNode = FocusNode(); //FocusNodeの追加

  @override
  void initState() {
    _focusNode.addListener(() {  //Focusが外れた際にFocusが戻るように設定
      if (!_focusNode.hasFocus) {
        _focusNode.requestFocus();
      }
    });
    super.initState();
  }

  @override
  void dispose() {
    _focusNode.dispose();  //FocusNodeのdispose
    super.dispose();
  }

  @override
  Widget build(BuildContext context) {
    return ValueListenableBuilder(
      valueListenable: _color,
      builder: (context, color, child) {
        return Actions(
          actions: >{
            RedIntent: RedAction(color: _color),
            BlueIntent: BlueAction(color: _color),
          },
          child: Scaffold(
            body: Center(
              child: Focus(
                focusNode: _focusNode,  //FocusNodeの設定
                autofocus: true,
                child: Text(
                  'Hello World!',
                  style: TextStyle(
                    fontSize: 40,
                    color: _color.value,
                  ),
                ),
              ),
            ),
          ),
        );
      },
    );
  }
}どのキーが押されたかの判定(Shortcutsウィジェット)
どのキーが押されたかの判定はShortcutsウィジェットで行います。
ここで重要になる要素がIntentです。
Intentはショートカットキーが押された時に後述するActions ウィジェットに
橋渡しするものとなります。
ショートカットキーが押されると、対応するIntentがウィジェットツリーを子の方向に伝っていって、
Actionsウィジェットまで到達し、処理が実行されます。
「control + R」を押下した際に橋渡しされるIntentを以下のように定義します。
class RedIntent extends Intent {
  const RedIntent();
}続いてShortcutsウィジェットの設定です。
先程定義したFocusウィジェットよりも祖先に、Shortcutsウィジェットを配置します。
shortcutsプロパティに、
キーの組み合わせとActionsウィジェットに送るIntentをMapで設定します。
以下はcontrolキーとRキーを同時押しした際の例となります。
Shortcuts(
  shortcuts: {
    LogicalKeySet(LogicalKeyboardKey.control, LogicalKeyboardKey.keyR):
        const RedIntent(),
  child: const MyWidget(),
),押されたキーに対応した処理の登録、実行(Actionsウィジェット)
押されたキーに対応した処理の登録、実行はActionsウィジェットにて行います。
まず、Actionクラスの拡張クラスを用意し、このクラス内に実行したい処理を定義します。
class RedAction extends Action {
  RedAction({required this.color});

  ValueNotifier color;

  @override
  Object? invoke(covariant RedIntent intent) {
    color.value = Colors.red;

    return null;
  }
}次に、Actions ウィジェットをShortcutsウィジェットよりも子の方向の位置に定義します。
actionsプロパティにてShortcutsウィジェットから流れてくるIntentとActionの組み合わせを
Mapで定義します。
Actions(
  actions: >{
    RedIntent: RedAction(color: _color),
  },
  child: Scaffold(
    //...
),上記のFocus, Shortcuts, Actions を実装した、最終的なサンプルアプリのコードが以下となります。
import 'package:flutter/material.dart';
import 'package:flutter/services.dart';

void main() {
  runApp(const MyApp());
}

class MyApp extends StatelessWidget {
  const MyApp({super.key});

  @override
  Widget build(BuildContext context) {
    return MaterialApp(
      home: Shortcuts(
        shortcuts: {
          LogicalKeySet(LogicalKeyboardKey.control, LogicalKeyboardKey.keyR):
              const RedIntent(),
          LogicalKeySet(LogicalKeyboardKey.control, LogicalKeyboardKey.keyB):
              const BlueIntent(),
        },
        child: const MyWidget(),
      ),
    );
  }
}

class MyWidget extends StatefulWidget {
  const MyWidget({super.key});

  @override
  State createState() => _MyWidgetState();
}

class _MyWidgetState extends State {
  final ValueNotifier _color = ValueNotifier(Colors.black);

  final FocusNode _focusNode = FocusNode();

  @override
  void initState() {
    _focusNode.addListener(() {
      if (!_focusNode.hasFocus) {
        _focusNode.requestFocus();
      }
    });
    super.initState();
  }

  @override
  void dispose() {
    _focusNode.dispose();
    super.dispose();
  }

  @override
  Widget build(BuildContext context) {
    return ValueListenableBuilder(
      valueListenable: _color,
      builder: (context, color, child) {
        return Actions(
          actions: >{
            RedIntent: RedAction(color: _color),
            BlueIntent: BlueAction(color: _color),
          },
          child: Scaffold(
            body: Center(
              child: Focus(
                focusNode: _focusNode,
                autofocus: true,
                child: Text(
                  'Hello World!',
                  style: TextStyle(
                    fontSize: 40,
                    color: _color.value,
                  ),
                ),
              ),
            ),
          ),
        );
      },
    );
  }
}

class RedIntent extends Intent {
  const RedIntent();
}

class RedAction extends Action {
  RedAction({required this.color});

  ValueNotifier color;

  @override
  Object? invoke(covariant RedIntent intent) {
    color.value = Colors.red;

    return null;
  }
}

class BlueIntent extends Intent {
  const BlueIntent();
}

class BlueAction extends Action {
  BlueAction({required this.color});

  ValueNotifier color;

  @override
  Object? invoke(covariant BlueIntent intent) {
    color.value = Colors.blue;

    return null;
  }
}
まとめ
本記事ではFlutterでのキーボードショートカットの実装方法について解説します。
いかがだったでしょうか?
複数のウィジェットを組み合わせての実装になるので、ちょっと難しく感じるかもしれません。 ですが、本記事で紹介したポイントを押さえれば、必ず実装できるはずです。
もっと深くキーボードショートカットについて知りたい方は、 以下の公式ドキュメントを読んでみるのをオススメします。
本記事があなたのアプリ開発の一助となれば幸いです。
Flutterを一緒に学んでみませんか? Flutter エンジニアに特化した学習コミュニティ、Flutter大学への入会は、 以下の画像リンクから。
参考
編集後記(2022/11/17)
先日編集後記に書いた2023年1月25日に何かある、というFlutter公式からのツイートに対し、 詳細が発表されました。
ケニアのナイロビで開かれるオンラインイベントの告知だったようです。
現状では基調講演やテクニカルトーク等が行われる予定、とのことです。
前回Flutter Vikings の開催と同時にFlutter 3.3が発表されたり、 その前のGoogle I/O の開催と同時にFlutter 3.0 が発表されたりしたので、 今回のイベントでもなんらかのアップデートが発表されるのでは?と予想してます。
とにかく、来年の1月が楽しみになる発表でした。
どんな機能が追加されるのか楽しみにしながら待ちたいと思います!
週刊Flutter大学では、Flutterに関する技術記事、Flutter大学についての紹介記事を投稿していきます。 記事の更新情報はFlutter大学Twitterにて告知します。

