

本記事ではそんな疑問、要望にお答えします。
Flutterのパッケージである animated_text_kit を使った、 テキストにアニメーションを付ける方法について解説します!
以下のようなアニメーションを設定することが可能です。

本記事を読めばテキストに様々なアニメーションを設定することができるようになります。 ぜひ読んでみて下さい!
基本的な使い方
animated_text_kitの基本的な使い方について解説していきます。
準備
まず準備として、パッケージのインストールと、 Dartファイルへのインポート文の追加を行います。
パッケージのインストール
CLI(macならターミナル)で、自分のプロジェクトのルートにて 以下のコマンドを実行しパッケージをインストールします。
flutter pub add animated_text_kitパッケージのインポート
UIを構築するDartファイルの上部に以下のインポート文を追加し、 パッケージをインポートします。
import 'package:animated_text_kit/animated_text_kit.dart';アニメーション付きテキストの実装
アニメーション付テキストを実装したい場所に、AnimatedTextKit Widgetを配置します。
AnimatedTextKit(
          animatedTexts: [],
        ),
animatedTexts プロパティ に、
自分の実装したいアニメーションの種類のAnimatedTextで囲んだテキストを配置します。
AnimatedTextKit(
          animatedTexts: [
            TypewriterAnimatedText('Hello World'),
          ],
        ),
今回の例では一文字づつ表示するアニメーションを付与する、
TypewriterAnimatedTextを使用しています。
他にどんな種類があるかは後述します。
この実装だけで、以下のようなアニメーションが。

サンプルコード全体
import 'package:animated_text_kit/animated_text_kit.dart';
import 'package:flutter/material.dart';

void main() {
  runApp(const MyApp());
}

class MyApp extends StatelessWidget {
  const MyApp({super.key});

  @override
  Widget build(BuildContext context) {
    return const MaterialApp(
      home: MyWidget(),
    );
  }
}

class MyWidget extends StatelessWidget {
  const MyWidget({super.key});

  @override
  Widget build(BuildContext context) {
    return Scaffold(
      body: Center(
        child: AnimatedTextKit(
          animatedTexts: [
            TypewriterAnimatedText('Hello World'),
          ],
        ),
      ),
    );
  }
}
アニメーションの種類
animated_text_kit パッケージには様々なアニメーションが用意されています。
こちらでも紹介されていますが、本記事でも紹介していきます。
Rotate
RotateAnimatedTextはテキストを上から下に回転して表示するようなアニメーションを付与します。
AnimatedTextKit(
          animatedTexts: [
            RotateAnimatedText('今日はいい天気ですね'),
            RotateAnimatedText('お元気ですか?'),
            RotateAnimatedText('私は元気です'),
          ],
        ),
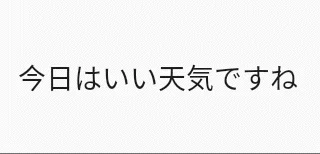
Fade
FadeAnimatedTextはテキストをフェードイン・フェードアウトする
アニメーションを付与します。
AnimatedTextKit(
          animatedTexts: [
            FadeAnimatedText('今日はいい天気ですね'),
            FadeAnimatedText('お元気ですか?'),
            FadeAnimatedText('私は元気です'),
          ],
        ),
Typer
TyperAnimatedTextはテキストを1文字づつ表示するアニメーションを付与します。
AnimatedTextKit(
          animatedTexts: [
            TyperAnimatedText('今日はいい天気ですね'),
            TyperAnimatedText('お元気ですか?'),
            TyperAnimatedText('私は元気です'),
          ],
        ),
Typewriter
TypewriterAnimatedTextはタイプライターで書いているように
テキストを1文字づつ表示するアニメーションを付与します。
AnimatedTextKit(
          animatedTexts: [
            TypewriterAnimatedText('今日はいい天気ですね'),
            TypewriterAnimatedText('お元気ですか?'),
            TypewriterAnimatedText('私は元気です'),
          ],
        ),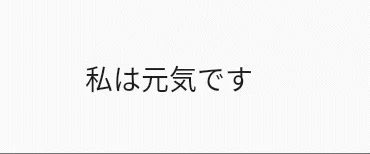
Scale
ScaleAnimatedText はテキストのサイズが大きくなったり小さくなったりする
アニメーションを付与します。
AnimatedTextKit(
          animatedTexts: [
            ScaleAnimatedText('今日はいい天気ですね'),
            ScaleAnimatedText('お元気ですか?'),
            ScaleAnimatedText('私は元気です'),
          ],
        ),
Colorize
ColorizeAnimatedTextはテキストの色を徐々に変化させるアニメーションを付与します。
AnimatedTextKit(
          animatedTexts: [
            ColorizeAnimatedText(
              '今日はいい天気ですね',
              textStyle: colorizeTextStyle,
              colors: colorizeColors,
            ),
            ColorizeAnimatedText(
              'お元気ですか?',
              textStyle: colorizeTextStyle,
              colors: colorizeColors,
            ),
            ColorizeAnimatedText(
              '私は元気です',
              textStyle: colorizeTextStyle,
              colors: colorizeColors,
            ),
          ],
),プロパティに設定したcolorizeTextStyleとcolorizeColorsはこちらです。
(好きなように設定可能です。)
const colorizeTextStyle = TextStyle(
  fontSize: 20,
  fontWeight: FontWeight.bold,
);

const colorizeColors = [
  Colors.purple,
  Colors.blue,
  Colors.yellow,
  Colors.red,
];
Wavy
WavyAnimatedTextはテキストが波打つようなアニメーションを付与します。
AnimatedTextKit(
          animatedTexts: [
            WavyAnimatedText('今日はいい天気ですね'),
            WavyAnimatedText('お元気ですか?'),
            WavyAnimatedText('私は元気です'),
          ],
        ),
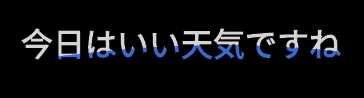
Flicker
FlickerAnimatedTextはネオンが点滅するようなアニメーションを付与します。
AnimatedTextKit(
          animatedTexts: [
            FlickerAnimatedText('今日はいい天気ですね'),
            FlickerAnimatedText('お元気ですか?'),
            FlickerAnimatedText('私は元気です'),
          ],
        ),
TextLiquidFill
TextLiquidFill Widget で設定できるアニメーションは、
文字内で液体が満ちるようなアニメーションを付与します。
※今までと異なり、AnimatedTextKit Widgetを使用しないことに注意です。
TextLiquidFill(
          text: '今日はいい天気ですね',
          textStyle: const TextStyle(
            fontSize: 16,
            fontWeight: FontWeight.bold,
          ),
        ),
※textStyleは必須プロパティではありませんが、
デフォルトのfontSizeが140で設定されているため、設定しています。
まとめ
本記事では、Flutterのパッケージである animated_text_kit を使った、 テキストにアニメーションを付ける方法について解説しました。
いかがだったでしょうか? 使ってみたくなりましたか?
今回紹介しませんでしたが、 自作のアニメーションの実装もこのパッケージでできるとのことです。
アニメーションを実装すると、アプリの見た目がワンランク上がるので、 とても有用なパッケージだったかと思います。
ぜひ使ってみて下さい!
本記事があなたのアプリ開発の一助となれば幸いです。
Flutterを一緒に学んでみませんか? Flutter エンジニアに特化した学習コミュニティ、Flutter大学への入会は、 以下の画像リンクから。
参考
編集後記(2022/7/20)
animated_text_kit の紹介記事でした。
今回アニメーションの記事だったので、GIFをひたすら撮影しました。
GIFの作成は、Macの標準機能で動画撮影→GIFをこちらで作成という手順で行っていますが、 数が多いとなかなか大変でした。
もっと楽にできる方法があれば、ぜひTwitter等で教えていただけると嬉しいです。
ただ、色々とアニメーションを試すのはとても楽しかったですね。
今後もこのようなパッケージを他にも紹介していこうと思います。
週刊Flutter大学では、Flutterに関する技術記事、Flutter大学についての紹介記事を投稿していきます。 記事の更新情報はFlutter大学Twitterにて告知します。
